After using the entryway console, I previously built, for a couple of weeks I quickly realized the top left cubby was just a very inefficient use of space for storing things. So, the obvious thing to do was add some drawers for it. I wanted to add some flare to it since it’s one of the first things a visitor would see upon entering our home, so I incorporated some color to it! I used the same yellow paint that I’d used for the crib and dresser I built for my kid. At first I was hesitant to use such a bright color outside of kids’ furniture. But since our home already has a lot of yellow colors, it actually turned out great! Let me know what you think!
Check out the full build video below!
Affiliate links are used below. I get a small commission from sales made through them, at no extra cost to you 🙌
MATERIALS
Walnut Lumber
1/2” MDF
1/4” MDF
STEP 1: bottom drawer
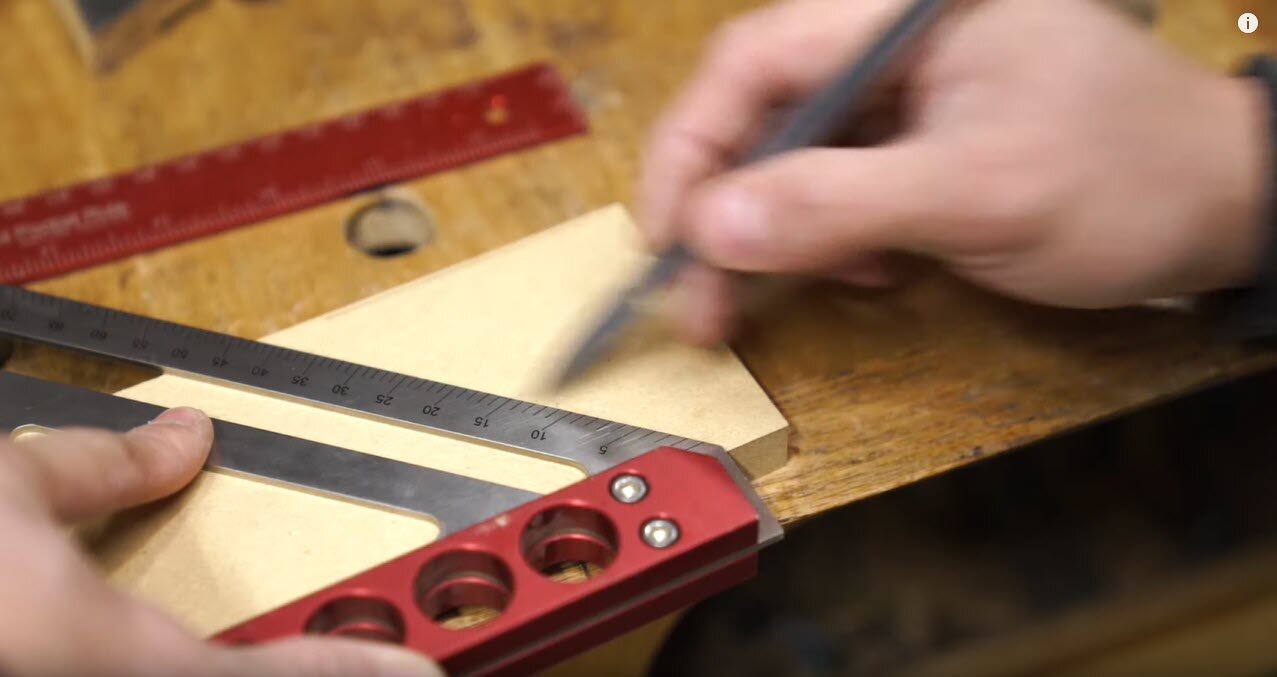
If I was building drawers for a rectangular opening, I’d just cut all the pieces for the drawer boxes at the same time. But I’m not. So I focused on the bottom drawer first, which has one side angled at 45 degrees.
After setting the blade at 45 degrees, the first cut I made on the workpiece was just to cut it down so that I could fit it into the cabinet opening so I could mark the final height that this box needed to be, and also to confirm the angle was indeed at 45 degrees.
Then I just adjusted my fence on the table saw to make the second cut to bring the piece to its final width.
The other three panels of the box were all cut with the blade set back to vertical. At this point I only cut the side pieces to their final lengths because they’ll receive rabbets for the front and back panels to sit in. So the lengths of those pieces will be determined after a dry-fit.
With the drawer slides and the side panels placed in the opening, I marked where to cut the front and back panels. Since they’ll both get a 45-deg crosscut on one end, I marked the line so I don’t end up cutting the piece too short. (I’ve done that before lol).
Since the other panels all sit vertically in the opening, the dados were cut with the blade set back at 90 degrees. I made two passes for each dado to get them to the proper width. Then I cut the drawer bottoms out of a piece of 1/4” MDF.
step 2: other drawer boxes
After doing a quick dry-fit of the bottom drawer to make sure everything fit together, and has all the proper clearances inside of the cabinet opening, I followed the same process to make the other two drawer boxes which were just straight up 90-degree cuts.
STEP 3: prep for painting
Next, I prepared all of the pieces for painting by sanding all of the surfaces up to 220 grit. Then I took a piece of 120 grit sandpaper to lightly go over the edge grain just to get rid of some of the fuzz. No need to get the edges super smooth at this point.
I decided to glue all of the boxes together first before painting because I didn’t want to deal with taping up all of the glue edges beforehand, to save some time.
STEP 4: priming material (IMPORTANT!)
The most important step to painting MDF is to prime the material, especially the edges because they’re so porous and will suck up a lot of paint. I covered up the edge grain with primer until there were no MDF showing. Then I let it sit for a couple of hours until it’s dry and came back to sand the edges smooth all the way up to 220 grit before starting the same process on the surfaces.
step 5: painting mdf
Once the primer dried, I applied two coats of this bright yellow paint, leftover from the crib and dresser I built for my kid over a year ago.
STEP 6: cutting the drawer fronts
The drawer fronts will be made from two layers. The bottom layer will be made from a piece of 1/2” MDF, which will also be painted. The top layer will be made from solid walnut. I made the rip cuts and crosscuts at the same time for both layers, since I want the two layers to sit flush against each other.
step 7: curved reveal / finger pull for drawer front
To make the curved reveal on the walnut layer, I first had to trace and cut a curve on a piece of 1/4” MDF, which will be the template. The more symmetrical this curve is, the better because the reveals will line up better between the drawer fronts once they’re in place. Then, I traced the curve from the template to the walnut workpieces and removed the bulk of the material using my jigsaw.
I used some double sided tape to attach the template to the walnut piece and finalized the shape of the drawer front at my router table, using a flush trim bit. For the reveal to also function as a finger pull, I used a 45-deg chamfer bit with a bearing on top to put a bevel along the curved edge. Note, the cutting height of the chamfer bit will dictate how thick the walnut layer will be.
STEP 8: install drawers
To install the drawer boxes, I usually start by using a scrap piece of offcut to set the position of the male side of the slides on the case. Then I’d position the drawer boxes in the opening to determine where to mount hte female side of the slides. Once the bottom drawer box is in place, I can then just work my way up from there to install the other boxes, using the drawer box below as reference.
step 9: install drawer fronts
With the MDF layer painted, and the walnut layer finished, I attached the two layers together using some brad nails. Then using some plastic cards, I kept the drawer fronts spaced evenly in the cabinet opening before I secured them to the drawer boxes with a couple of screws from the inside.