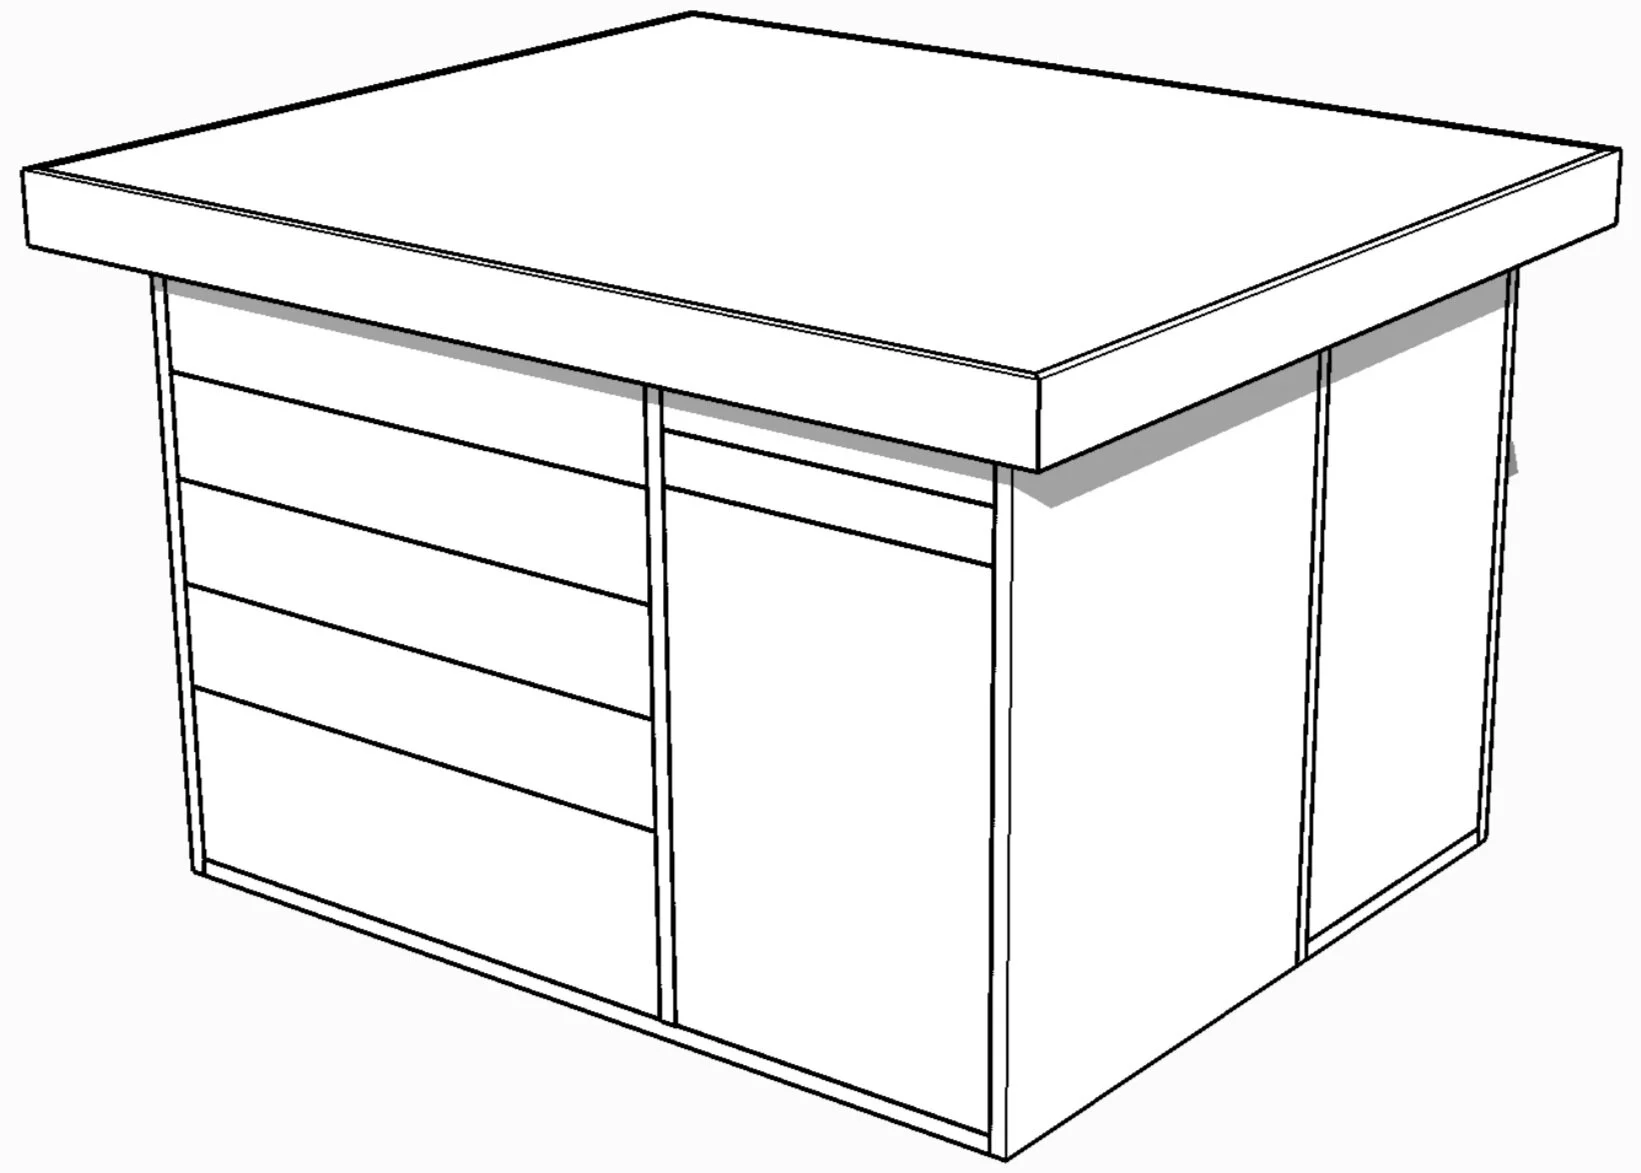
Hey guys, in this video I will show you how to build this workbench / assembly table / outfeed table with a torsion box top. The torsion top will provide a rigid and flat surface for all your assembly needs. It also has a ton of storage, with 7 drawers and three cabinets, there's room for just about everything!
Check out the full build video below!
Affiliate links are used below. I get a small commission from sales made through them, at no extra cost to you 🙌
TOOLS
STEP 1: BREAKING DOWN Plywood
I began the build by breaking down some birch 3/4” plywood with a track saw and table saw. Before assembling the pieces together, I applied some iron-on type edge banding to cover up the exposed plywood edges on the cabinet sides.
STEP 2: main case glue-up
I began the assembly process of the main case by drilling pocket holes on the two side panels and the underside of the bottom panel. With glue applied to the joints, I squared up the panels with some corner clamps and then tied them together with screws and clamps.
With the two side panels attached to the bottom panel, I measured for the size of the vertical partition and cut it on the table saw. I also crosscut the longer left side stretchers to size and used that to mark the length of the shorter stretchers. I snuck up on the cut until I got the perfect fit. And then cut pocket holes into the pieces off camera before I moved on to assembly. I placed the stretchers on the bottom panel to help me locate and square up the vertical partition. Then using some clamps to hold it down, I screwed it in place. Finally, I attached horizontal stretchers on top to tie everything together.
I measured and cut the 3/4” back panel for the main case. Using my track saw and a giant square helps me to square up one corner of the workpiece, which will be a good reference point to square up the other corners when I cut it down to size. After I applied glue along the back edges of the main case assembly I placed the back panel on top and secured it using clamps and screws.
STEP 3: REAR cabinets glue-up
With the main case complete, I moved on to breaking down the pieces for the two rear cases. Same as before, I drilled pocket holes into the three panels that would make up each side of the rear cabinets. Because these two cabinets are mirror images of each other, be sure to drill the panels along the correct edges. Order of operation here isn’t really crucial, but I first assembled the rear panel to the side panel, and then the two are tied together by the bottom panel. In the video I attached one of the top stretchers to the rear cabinets, but skip this step until after you’ve attached these cabinets to the main case, because it’s easy to make a mistake and attach it to the wrong side…just like I did in the video haha.
With the main case face down, i applied glue along the edges of the first rear cabinet and attached it to the main case with screws through the panels as well as the stretcher.
STEP 4: casters & leveler attachment
Next, I moved on to installing some leveling feet and workbench casters with release plates so the cabinet can remain level and sturdy when in use, but still mobile if I ever have to move it.
STEP 5: drawer boxes
To make the drawer boxes, I cut down some 1/2” ply, then set up my router table to quickly run some 1/4” dados for accepting the 1/4” drawer bottoms. I first attach three of the four sides of the drawer box, then drop the 1/4” drawer bottom into the dados, and close everything up with the fourth side of the box. Rinse and repeat this process for all of the boxes.
I installed the drawer boxes by first attaching the bottom drawer slide with a spacer, then positioned the bottom box about a 1/4” up from the base using a couple of 1/4” plywood pieces. To attach the slide to the drawer box, I first pulled the slides out with the box in order to fasten two screws to either side. Then I pulled the drawer box out to fasten the third screw before sliding it back into the drawer slides.
I repeated this for the rest of the drawer boxes on the left side of the main case before moving on to the two shallow drawers on the right side. I used a long piece of offcut to help me install the drawer slides, just as I did previously, but instead of referencing the drawer box position off of the bottom of the case, I simply found the middle of the drawer boxes and attached the male end of the drawer slide along that line.
STEP 6: shelf pins
To add some shelves to the cabinet under the two shallow drawers, I used this jig by Kreg to quickly cut some holes for the shelf pins.
STEP 7: drawer fronts & doors
The drawer fronts and front door was made from a single sheet of 3/4” ply in order to keep a continuous grain pattern. I used some spacers to help me place the drawer fronts in the proper location and fastened them to the drawer boxes with screws from the inside.
Finally, I laid out for where to drill the holes for attaching the drawer pulls. The holes were drilled slightly larger than the screws that came with the pulls to account for any tolerances and will give me some room to make adjustments before tightening down.
Before installing the drawer fronts on the two shallow drawers on the top right, I first installed the door which will become the reference for the position of the two small drawer fronts on top. Once the door is in position, I installed the top two drawer fronts, using the top edge of the door as reference.
Using the same process, I installed the doors to the side cabinets as well.
STEP 8: torsion top
With the case complete, it’s time to start building the torsion top. Here I’m measuring and cutting the lower skin of the torsion top as well as all the pieces that will make up the frame and the grid from a single sheet of 1/2” MDF.
I first attached the outer frame pieces to the lower skin. I used a square and clamps to hold everything in place before shooting some bradnails. Next, I attached the long inner grid pieces to the lower skin using a couple of short grid pieces as spacers to keep things straight and spacing consistent. Once the long inner grids were attached, I attached the short pieces using the same method. Take your time and always note where your fingers are because the Brad nail shots can get a bit awkward.
Before placing the top skin on, I marked the location of the grids on the side frame. I then laid the top skin on after applying glue over the top edge of the grid. The top skin was cut larger than the lower portion of the torsion top so I can just simply flush things up later with my router.
Finally, I moved the torsion box on to the cabinet and moved it in position with 3” of overhang on the front and sides. Lastly, attaching them together by shooting screws from the bottom.
STEP 9: trim
Lastly, I added some trim to protect and hide the ugly edges of the torsion top. I used a piece of walnut for this. To install the trim, I first cut a 45-deg miter on one end, and then took a referential measurement at the workbench to figure out where to cut the other end. I attached the front and rear trim pieces first using glue and clamps., but my clamps weren’t long enough for the side to side span, I ended up just shooting a few brad nails to hold those down. The brad nail holes turned out to be pretty hard to see against the dark wood, so I didn’t bother filling those.
Lastly, I applied a couple coats of Shellac to finish off the project.